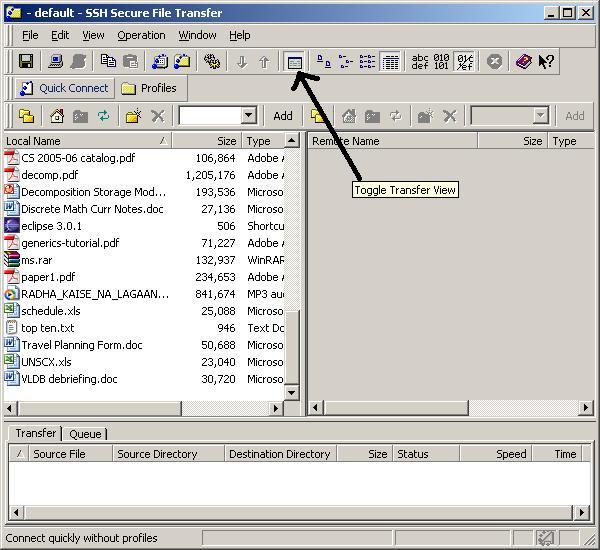
PCs have an application called SSH Secure File Transfer Client. Find this and launch it now. (Macs have a similar application called Mac SFTP that is available for download from the ITS software list, but we won't demonstrate it here.) The SSH application should look like the picture below.
If your view does not look like the picture, try pressing the "Toggle Transfer View" button as indicated in the picture.
Press the "Quick Connect" button near the upper-left of the application to log into antipasto. In the diaglogue box that appears, type antipasto.union.edu for the Host Name and your account name for the User Name. Your account name will be given to you by your instructor.
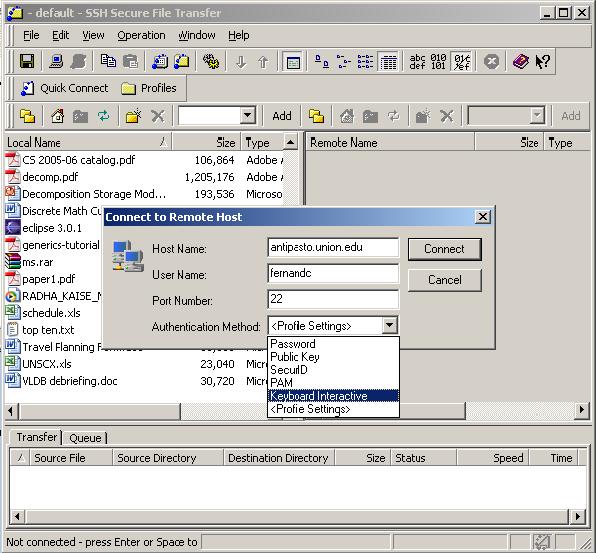
Don't worry about the Port Number. For the menu labeled Authentication Method, select "Keyboard Interactive" from the menu if it shows up as one of the choices. If it is not one of the choices, then don't worry about it. Then press the Connect button. You will be asked for your password (also given to you by your instructor) and then be logged in.
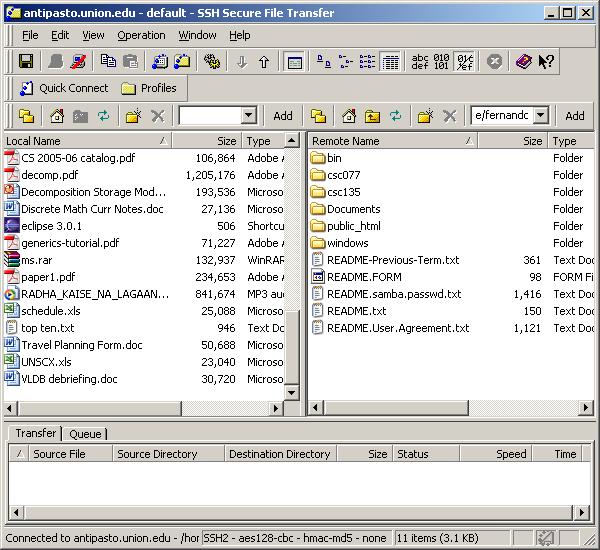
The list of files on the left are those on your local machine. The ones on the right are the files in your antipasto account. One of the directories on antipasto on the right-hand side is called public_html. You must transfer your web files into this directory so double-click on it now to get into it. Then find your web page files in the left-hand side of the window.
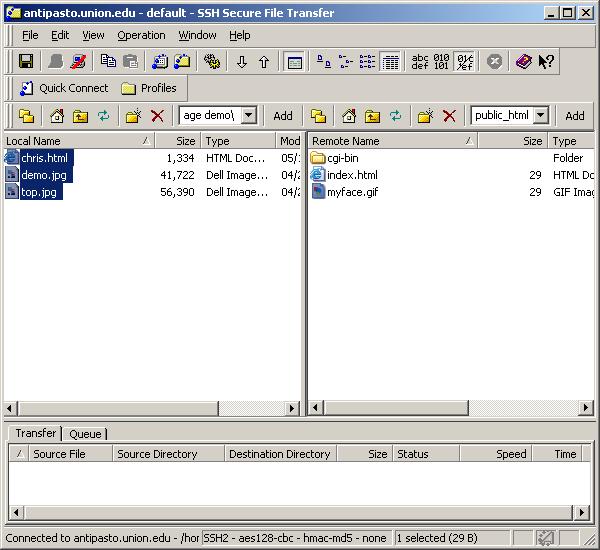
Transfer all of your HTML files and picture files onto antipasto by clicking and dragging them to the right side of the window, as shown in the picture below.
http://antipasto.union.edu/~your_acctName/HTML filename
For example, my account name is fernandc and, in the picture above,
I transferred an HTML file called chris.html. The URL is:
http://antipasto.union.edu/~fernandc/chris.html
Note the mandatory tilde (~) before the account name. Also, if you named your HTML file "index.html", you can omit the HTML filename part of the URL. Try it! Then give the URL to your friends. You're on the Internet!
If you have individual questions, don't hesitate to ask your instructor for help.